Mounting Tv On Wall In Corner
Mounting a TV on the wall in a corner can be a great way to save space and improve the aesthetics of your room. However, it is important to do it correctly to ensure that your TV is secure and functioning properly.
Here are some tips on how to mount a TV on a wall in a corner:
1. Choose the Right Mount
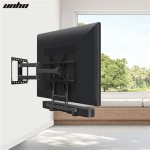
The first step is to choose the right mount for your TV. There are many different types of mounts available, so it is important to find one that is compatible with your TV and that will fit in the corner space. Some mounts are designed specifically for corner mounting, while others can be adapted to fit in a corner.
2. Find the Studs
Once you have chosen a mount, you need to find the studs in the wall where you will be mounting the TV. Studs are the vertical supports in the wall that provide strength and stability. It is important to mount the TV into studs to ensure that it is secure.
To find the studs, you can use a stud finder. Stud finders are available at most hardware stores. Once you have found the studs, mark their location on the wall with a pencil.
3. Mark the Mounting Holes
Next, you need to mark the mounting holes on the wall. The mounting holes are the holes that will be used to attach the mount to the wall. The location of the mounting holes will vary depending on the type of mount you are using.
To mark the mounting holes, hold the mount up to the wall in the desired location. Use a level to make sure that the mount is level. Once the mount is level, use a pencil to mark the location of the mounting holes.
4. Drill the Pilot Holes
Once you have marked the mounting holes, you need to drill the pilot holes. The pilot holes are the small holes that will be used to guide the screws into the studs. The size of the pilot holes will depend on the size of the screws you are using.
To drill the pilot holes, use a drill bit that is slightly smaller than the screws. Drill the pilot holes to a depth of about 1 inch.
5. Attach the Mount to the Wall
Now you are ready to attach the mount to the wall. To do this, insert the screws into the pilot holes and tighten them until the mount is securely attached to the wall.
6. Mount the TV to the Mount
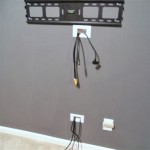
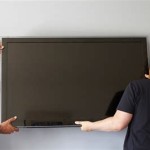
Once the mount is attached to the wall, you can mount the TV to the mount. To do this, lift the TV onto the mount and align the mounting holes on the TV with the mounting holes on the mount. Insert the screws into the mounting holes and tighten them until the TV is securely attached to the mount.
7. Connect the Cables
Once the TV is mounted, you need to connect the cables. To do this, connect the power cord, HDMI cables, and any other necessary cables to the back of the TV. Then, run the cables through the cable management system on the mount and connect them to the appropriate devices.
8. Enjoy Your TV
Once the cables are connected, you can turn on your TV and enjoy it. Be sure to check the TV regularly to make sure that it is still securely mounted to the wall.

25 Best Corner Tv Mount Ideas Wall Mounted

Corner Tv Mount Benefits Of Mounting Your In The

How To Catty Corner Mount Your Tv For The Perfect Fit Nextdaytechs On Site Technical Servicesnextdaytechs Services

Corner Tv Mount Benefits Of Mounting Your In The

Corner Tv Mount Benefits Of Mounting Your In The

Can You Mount A Tv In Corner Yes Primecables Ca Blog

How To Mount Your Tv In A Corner Kanto Solutions

Zsl5502 A Cornermount All In One Corner Tv Mounting Solution Avf Group North America

Corner Tv Mount Full Motion Fits 32 65 Flat Curved Screen Tvs Hold Forgingmount
%20-%20Marcelo%20Jaldin.jpg?strip=all)
Corner Tv Mount Benefits Of Mounting Your In The


