How To Wall Mount A 55-Inch TV
Wall mounting a 55-inch TV offers numerous benefits, including optimizing space, improving viewing angles, and creating a clean, modern aesthetic. However, the process requires careful planning, the right tools, and adherence to safety guidelines. This article provides a comprehensive guide on how to wall mount a 55-inch TV safely and effectively.
Preparation and Assessment
Before commencing the wall mounting project, meticulous preparation is crucial. This involves assessing wall suitability, gathering necessary tools and materials, and understanding the TV's specifications. Neglecting these initial steps can lead to installation errors or even structural damage.
Wall Assessment: The first step is to determine the type of wall onto which the TV will be mounted. Common wall types include drywall, plaster, concrete, and brick. Drywall, while prevalent, is the least sturdy and requires careful consideration. It is imperative to locate wall studs, which are vertical wooden or metal beams that provide structural support. These studs are typically spaced 16 or 24 inches apart. A stud finder is an essential tool for accurately locating these studs behind the drywall. Avoid relying solely on knocking or tapping on the wall, as this method is often unreliable.
If mounting on concrete or brick, specialized anchors designed for these materials will be necessary. These anchors provide a secure grip within the masonry, preventing the TV from detaching from the wall. It is crucial to select anchors that are rated for the weight of the TV.
For plaster walls, the assessment is more complex. Plaster walls often have a lath backing, which can be brittle. Drilling directly into plaster without proper support can cause the plaster to crumble. Using a stud finder is still recommended to locate studs behind the plaster. If studs are not accessible, consider using a specialized plaster anchor that distributes the weight over a larger surface area.
Tool & Material Gathering: A comprehensive list of tools and materials is essential for a successful wall mounting project. These include:
- Stud Finder: As mentioned, this tool is crucial for locating studs behind drywall or plaster. Electronic stud finders are generally more accurate than magnetic ones.
- Drill: A power drill with various drill bits is necessary for creating pilot holes and securing the mounting bracket.
- Level: A level ensures that the TV is mounted horizontally and vertically. A bubble level or a laser level can be used.
- Screwdriver: Both Phillips head and flathead screwdrivers may be required, depending on the mounting bracket and TV.
- Measuring Tape: A measuring tape is essential for accurately positioning the mounting bracket and ensuring proper alignment.
- Pencil: A pencil is used for marking the desired location and drill points on the wall.
- Socket Wrench or Adjustable Wrench: These tools may be needed to tighten the lag bolts or screws used to secure the mounting bracket to the wall.
- Safety Glasses: Protect your eyes from debris when drilling.
- Work Gloves: Provide a better grip and protect your hands.
- Wall Mount: Choose a wall mount specifically designed for a 55-inch TV. Ensure it is VESA compatible and rated for the TV's weight. There are various types of mounts, including fixed, tilting, and full-motion.
- Lag Bolts or Screws: Use high-quality lag bolts or screws to securely attach the mounting bracket to the wall studs or anchors.
- Washers: Washers help to distribute the pressure from the bolts or screws, preventing damage to the wall.
- TV Mounting Screws: These screws attach the mounting arms to the back of the TV. Ensure they are the correct size and length for your specific TV model.
- Cable Management Accessories: Cable ties, tubing, or wall plates can help to conceal and organize cables for a cleaner look.
TV Specifications: Before proceeding, consult the TV's user manual to determine its weight and VESA (Video Electronics Standards Association) mounting pattern. The weight is crucial for selecting a wall mount that can safely support the TV. The VESA pattern refers to the spacing of the mounting holes on the back of the TV, which must match the mounting bracket. VESA measurements are typically expressed in millimeters (e.g., 200x200mm, 400x400mm). The user manual will also indicate the appropriate screw size and length for attaching the mounting arms to the TV. Using the wrong screws can damage the TV's internal components.
Mounting Bracket Installation
With the preparations completed, the next step is to securely install the mounting bracket to the wall. This is a critical step that demands precision and adherence to safety guidelines.
Locating and Marking Studs: Using the stud finder, locate the wall studs in the desired mounting area. Once a stud is located, mark its edges with a pencil. Determining both edges provides a more accurate center point for drilling. It is advisable to locate at least two studs to ensure a stable and secure mounting. If only one stud is accessible, consider using a larger mounting bracket that spans a wider area or exploring alternative mounting solutions that utilize multiple anchors.
Positioning the Mounting Bracket: Position the mounting bracket against the wall at the desired height. Use a level to ensure that the bracket is perfectly horizontal. Mark the locations of the mounting holes on the wall, corresponding to the stud locations. These marks will serve as guides for drilling pilot holes.
Drilling Pilot Holes: Using a drill bit slightly smaller than the diameter of the lag bolts or screws, drill pilot holes at the marked locations. The pilot holes should penetrate deep enough into the stud to provide a secure anchor for the bolts or screws. For concrete or brick walls, use a masonry drill bit and ensure the pilot holes are deep enough to accommodate the anchors.
Attaching the Mounting Bracket: Align the mounting bracket with the pilot holes and insert the lag bolts or screws through the bracket and into the holes. Use a socket wrench or adjustable wrench to tighten the bolts or screws securely. Avoid overtightening, as this can strip the threads or damage the wall. Ensure that the bracket is firmly attached to the wall and does not wobble or shift.
Attaching the Mounting Arms to the TV
With the mounting bracket securely installed on the wall, the next step is to attach the mounting arms to the back of the TV. This process requires careful handling of the TV to avoid damage.
Protecting the TV Screen: Before handling the TV, place it face down on a soft, padded surface, such as a blanket or a piece of foam. This will protect the screen from scratches or damage during the installation process.
Identifying the VESA Mounting Holes: Locate the VESA mounting holes on the back of the TV. These holes are typically arranged in a square or rectangular pattern. Refer to the TV's user manual to confirm the VESA pattern and the appropriate screw size and length.
Attaching the Mounting Arms: Align the mounting arms with the VESA mounting holes and insert the TV mounting screws through the arms and into the holes. Ensure that the screws are fully seated and tightened securely. Avoid overtightening, as this can damage the TV's internal components. Use washers if necessary to ensure a snug fit and prevent the screws from bottoming out in the holes.
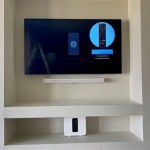
Hanging the TV on the Mounting Bracket
The final step is to carefully lift the TV and hang it on the mounting bracket. This step often requires two people to ensure safety and prevent damage to the TV or the wall.
Lifting the TV: With assistance, carefully lift the TV and align the mounting arms with the corresponding hooks or slots on the mounting bracket. The lifting process should be slow and controlled to prevent accidental drops or impacts. Ensure that both people lifting the TV have a firm grip and are coordinating their movements.
Securing the TV to the Mounting Bracket: Once the mounting arms are aligned with the bracket, gently lower the TV into place. Most mounting brackets have a locking mechanism or screws that secure the TV to the bracket. Engage the locking mechanism or tighten the screws according to the manufacturer's instructions. Verify that the TV is securely attached to the bracket and does not wobble or shift.
Cable Management
After the TV is securely mounted, the final step is to manage the cables for a clean and organized appearance. Cable management is crucial for aesthetics and preventing accidental disconnections or damage.
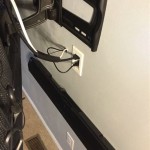
Routing Cables: Route the power cable, HDMI cables, and other necessary cables along the back of the TV and down the wall. Use cable ties or Velcro straps to bundle the cables together and keep them organized.
Concealing Cables: There are several options for concealing the cables. Cable sleeves or tubing can be used to encase the cables and hide them from view. Wall plates with cable pass-throughs can be installed to route the cables through the wall. Consider using a professional cable management service for a more seamless and hidden installation.
Connecting Peripherals: Connect all necessary peripherals, such as cable boxes, gaming consoles, and streaming devices, to the TV. Ensure that all connections are secure and properly configured.
Final Adjustments and Verification
Before considering the project complete, perform final adjustments and verify that everything is working correctly.
Leveling the TV: Use a level to ensure that the TV is perfectly horizontal. If necessary, make minor adjustments to the mounting bracket to level the TV.
Testing the TV: Turn on the TV and verify that all functions are working correctly. Check the picture quality, sound, and connectivity to all peripherals.
Securing Cables: Recheck all cable connections and ensure that they are securely fastened. Double-check that the cables are properly managed and concealed.
Safety Precautions
Throughout the entire wall mounting process, prioritize safety. Following proper safety precautions can prevent injuries and damage to the TV or the wall.
Use Appropriate Safety Gear: Wear safety glasses to protect your eyes from debris when drilling. Wear work gloves to provide a better grip and protect your hands.
Seek Assistance: Lifting and mounting a 55-inch TV is a two-person job. Enlist the help of another person to ensure safety and prevent accidental drops or injuries.
Follow Manufacturer's Instructions: Always refer to the manufacturer's instructions for both the TV and the wall mount. The instructions provide specific guidance on installation procedures and safety precautions.
Consult a Professional: If unsure about any aspect of the wall mounting process, consult a professional installer. A professional can ensure that the TV is mounted safely and securely.

How To Wall Mount Your Tv X80h X90h X91h X95h Series Of 55 65 Inches Sony Sg

How High Should A 55 Inch Tv Be Mounted Hellotech

55 Inch Tv Wall Mount Why It S The Ideal Size For Your

Samsung Ua55tu8000 Tv Wall Mount Youtube

Vonhaus Tilting Tv Bracket Tilt Wall Mount For 26 55 Inch Tvs

55 Inch Led Tv With Wall Mount On Al

Things To Consider Before Mounting Your Samsung Tv On A Wall

Tv Bracket Wall Mount Double Arms Ultra Strong Stable Support Lcd Led 32 55 Inch

55 Inch Tv Wall Mount Dimensions

Heavy Duty Tv Wall Bracket Mount Double Cantilever Arms For 32 40 43 47 50 55 56 Inch