Wall Mounting Your Insignia 32-Inch TV: A Comprehensive Guide
Wall mounting a television, particularly a 32-inch Insignia model, offers several advantages. It frees up valuable floor space, enhances the viewing experience by positioning the screen at an optimal height, and can contribute to a cleaner, more modern aesthetic within a room. This article provides a detailed guide to successfully and safely wall mounting your Insignia 32-inch TV, covering essential equipment, preparation steps, and the mounting process itself.
Before commencing any wall mounting project, careful planning and preparation are crucial. Rushing into the process without proper consideration can lead to complications, potential damage to the TV or the wall, and even personal injury. This guide aims to equip the reader with the necessary knowledge to execute the task efficiently and effectively.
Key Point 1: Gathering the Required Equipment and Tools
The success of wall mounting a television hinges on having the appropriate equipment and tools readily available. A missing item can halt the process and introduce unnecessary delays. The following list outlines the essential items required for this project:
1. Wall Mount: Selecting the correct wall mount is paramount. The Video Electronics Standards Association (VESA) standard specifies the mounting interface on the back of your TV. This standard is crucial for compatibility with wall mounts. The VESA standard for a 32-inch Insignia TV, along with its weight, can usually be found in the TV’s user manual or on the manufacturer’s website. Common VESA sizes for 32-inch TVs include 100x100mm or 200x100mm. There are three primary types of wall mounts:
* Fixed Mounts: These mounts hold the TV flush against the wall. They are the simplest and most affordable option. However, they offer no adjustability, making it essential to position the mount precisely during installation. * Tilting Mounts: These mounts allow the TV to be tilted vertically. This can be beneficial for reducing glare or improving the viewing angle when the TV is mounted higher than eye level. * Full-Motion Mounts: Also known as articulating mounts, these offer the greatest flexibility. They allow the TV to be swiveled, tilted, and extended away from the wall. This type of mount is ideal for situations where multiple viewing angles are desired.2. Drill: A power drill is necessary for creating pilot holes for the wall mount screws. A cordless drill is recommended for ease of use and maneuverability.
3. Drill Bits: The drill bit size should correspond to the size of the wall anchors or screws being used. A variety of drill bits should be available to accommodate different wall types (e.g., wood, drywall, concrete).
4. Screwdriver: A screwdriver is required for attaching the mounting brackets to the back of the TV and securing the wall mount to the wall. Both Phillips head and flathead screwdrivers should be readily available.
5. Stud Finder: A stud finder is used to locate wall studs, which are vertical wooden beams that provide structural support. Mounting the TV to wall studs is the most secure option, especially for heavier televisions. If studs are not accessible, appropriate drywall anchors must be used.
6. Level: A level is essential for ensuring that the wall mount is installed straight. A bubble level or a laser level can be used.
7. Measuring Tape: A measuring tape is needed to determine the desired height of the TV and to accurately position the wall mount on the wall.
8. Pencil: A pencil is used to mark the locations for the drill holes.
9. Wall Anchors: If mounting the TV to drywall without studs, wall anchors are necessary to provide sufficient support. The type of wall anchor should be chosen based on the weight of the TV and the thickness of the drywall. Toggle bolts are a robust option for heavier TVs.
10. Cable Management Solutions: These facilitate hiding or organizing cables for a cleaner appearance. Options include cable ties, cable sleeves, and in-wall cable management kits.
11. Safety Glasses: Safety glasses protect the eyes from debris during drilling and installation.
12. Gloves: Gloves provide a better grip and protect the hands during the installation process.
Key Point 2: Preparing for the Wall Mounting Process
Before commencing the physical installation, several preparatory steps are crucial. These steps ensure safety, prevent damage to the TV and the surrounding environment, and optimize the viewing experience.
1. Unplug the TV: Disconnect the television from the power outlet. This is a fundamental safety precaution to prevent electrical shock during the installation process.
2. Clear the Area: Remove any furniture or obstacles from the area where the TV will be mounted. This provides ample space to work and prevents accidental damage to surrounding objects.
3. Determine the Mounting Location: Decide on the desired location for the TV. Consider the viewing distance and the viewing angle. The center of the screen should ideally be at eye level when seated. Take into account any windows or light sources that might cause glare.
4. Locate Wall Studs (If Applicable): Use a stud finder to locate the wall studs in the chosen area. Mark the stud locations with a pencil. If mounting to studs, ensure that the wall mount bracket can be positioned to align with the stud spacing. If stud mounting is not possible, select appropriate drywall anchors rated for the weight of the TV.
5. Attach Mounting Brackets to TV: Attach the mounting brackets to the back of the TV using the screws provided with the wall mount. Refer to the wall mount instructions for the correct screw size and placement. Ensure that the brackets are securely fastened to the TV.
6. Measure and Mark the Wall: Using the level and measuring tape, determine the exact location for the wall mount bracket. Mark the screw hole locations on the wall with a pencil. Ensure that the marked locations are level and correspond to the stud locations (if applicable).
7. Test the TV: Before fully committing to the install, temporarily connect the TV power and an HDMI cable to verify that the TV is functional and displaying correctly. This helps avoid discovering a problem after the TV is already mounted.
Key Point 3: Executing the Wall Mounting Procedure
With the necessary equipment and preparation completed, the actual wall mounting procedure can be executed. This requires precision and careful attention to detail to ensure a secure and aesthetically pleasing result.
1. Drill Pilot Holes: Using the drill and the appropriate drill bit, drill pilot holes at the marked locations on the wall. If mounting to studs, drill through the drywall and into the center of the stud. If using wall anchors, drill holes large enough to accommodate the anchors.
2. Install Wall Anchors (If Applicable): If mounting to drywall without studs, install the wall anchors into the pilot holes. Follow the manufacturer’s instructions for the specific type of wall anchor being used. Ensure that the anchors are securely seated in the wall.
3. Attach Wall Mount Bracket: Align the wall mount bracket with the pilot holes and the installed wall anchors (or studs). Secure the bracket to the wall using the screws provided with the wall mount. Tighten the screws firmly, but avoid over-tightening, which can strip the screws or damage the wall.
4. Hang the TV: Carefully lift the TV and align the mounting brackets on the back of the TV with the wall mount bracket. Secure the TV to the wall mount bracket according to the wall mount instructions. This typically involves engaging locking mechanisms or tightening screws.
5. Verify Level and Security: Use the level to ensure that the TV is perfectly level. If necessary, make minor adjustments to the wall mount or the TV position. Double-check that all screws and locking mechanisms are securely fastened.
6. Connect Cables: Connect the necessary cables to the TV, such as the power cord, HDMI cables, and any other desired connections. Organize the cables using cable ties or cable sleeves to create a clean and professional appearance. If using an in-wall cable management kit, route the cables through the wall according to the kit instructions.
7. Test the Installation: Plug the TV back into the power outlet and turn it on. Verify that the TV is functioning correctly and that all connected devices are working properly. Check the viewing angle and make any necessary adjustments to the TV position.
8. Final Touches: Conceal any remaining cables with cable covers or by routing them behind furniture. Clean up any debris or tools from the work area.
By following these steps carefully and meticulously, the process of wall mounting an Insignia 32-inch TV can be completed safely and efficiently, resulting in an improved viewing experience and a more aesthetically pleasing living space.

Insignia Fixed Tv Wall Mount For Most 19 43 Tvs Black Ns Htvmfab Best

Insignia 13 32 Fixed Position Tv Wall Mount

Insignia 13 32 Fixed Position Tv Wall Mount Model Ns Htvmf1701 C

Secu Tilt Swivel Tv Wall Mount For 28 32 40 42 46 47 50 Led Lcd Plasma Hdtv Vizio Sony Sceptre Insignia Bracket Bhn

Insignia 13 32 Tilting Tv Wall Mount Model Ns Htvmt1701 C

Secu Tilt Swivel Tv Wall Mount For 28 32 40 42 46 47 50 Led Lcd Plasma Hdtv Vizio Sony Sceptre Insignia Bracket Bhn

Insignia 13 32 Tilting Tv Wall Mount Ns Htvmt1701 C

Secu Ml510b B4 Wall Mount For Flat Panel Display Black

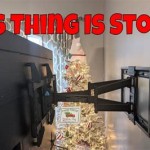
Insignia Full Motion Tv Wall Mount For Most 42 90 Tvs Extends 22 Black Ns Tvlfmb Best

Insignia Full Motion Tv Wall Mount For Most 42 90 Tvs Extends 22 Black Ns Tvlfmb Best