How To Install a TV Wall Mount on Drywall
Installing a TV wall mount on drywall can be a straightforward project for the average homeowner, provided careful planning and execution are undertaken. It involves securing a mounting bracket to the wall, capable of supporting the weight of the television. The type of wall mount and the TV itself will dictate the specific steps involved, but the fundamental principles remain consistent. This article provides a comprehensive guide to installing a TV wall mount on drywall, ensuring a secure and aesthetically pleasing result.
Before commencing any work, several crucial preparatory steps must be completed. These steps ensure that the installation process is not only successful but also safe. Neglecting these initial considerations can lead to instability and potential damage to the wall, the TV, or both.
The first step involves verifying the compatibility of the TV and the wall mount. The VESA (Video Electronics Standards Association) standard defines the mounting interface on the back of most flat-panel TVs. This standard dictates the spacing of the mounting holes in millimeters. Consult the television’s user manual or measure the distance between the holes to determine the VESA compatibility needed for the wall mount. Ensure the chosen wall mount supports the TV’s VESA pattern and weight.
Weight is a critical factor. The wall mount must be rated to support the weight of the TV securely. Exceeding the weight capacity of the mount can lead to failure, potentially causing damage to the TV and the wall. The weight of the TV is typically listed in the user manual or on a sticker located on the back of the TV. Select a wall mount that has a weight capacity significantly higher than the TV's weight to provide a safety margin.
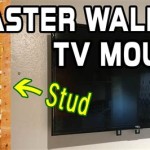
Next, locate the wall studs. Drywall alone cannot reliably support the weight of a TV. Wall studs are the vertical wooden or metal beams that provide structural support within the wall. The wall mount must be anchored to these studs to ensure stability. A stud finder is an essential tool for locating studs accurately. Electronic stud finders are readily available and typically detect changes in density within the wall, indicating the presence of a stud. Alternatively, physical stud finders can be used, which rely on identifying the location of nails or screws used to attach the drywall to the studs.
Once the studs are located, mark their positions clearly on the wall with a pencil. It’s advisable to verify the stud locations by drilling small pilot holes with a drill bit. This confirms that the markings are accurate and that the stud is solid. If a hollow sound is heard when drilling, it indicates that the drill has missed the stud.
Finally, consider the desired viewing angle and height. The height at which the TV is mounted will impact viewing comfort. A general guideline is to position the center of the screen at approximately eye level when seated. Consider the typical viewing distance and the height of seating arrangements when determining the optimal placement. Inclinable or swivel mounts offer greater flexibility in adjusting the viewing angle after installation.
Tools and Materials
Having the correct tools and materials readily available will streamline the installation process and contribute to a professional-looking result. This list includes not only the essential tools for securing the mount but also those for ensuring accurate measurements and cable management.
A stud finder is necessary for locating the wall studs. The accuracy of the stud finder is paramount for a secure installation. A level is crucial for ensuring that the wall mount is perfectly horizontal. A torpedo level or a longer level can be used, depending on the size of the wall mount. A drill with various drill bits is needed for creating pilot holes and securing the mounting screws. A screwdriver, either manual or powered, is used to tighten the screws. If using a power drill, ensure it is set to a low torque setting to avoid over-tightening the screws.
A pencil is used for marking stud locations and drilling points. A measuring tape is essential for accurate measurements of the wall and the TV. Safety glasses are crucial for protecting the eyes from dust and debris generated during drilling. Gloves can protect the hands and improve grip during the installation process. Wire strippers and electrical tape are necessary if any electrical work is involved, such as relocating outlets. However, it is strongly recommended to hire a qualified electrician for any electrical work.
The mounting hardware included with the wall mount typically includes screws, washers, and anchors. Ensure that the hardware is suitable for the specific type of wall (drywall and wood studs). If the included hardware is not adequate, purchase appropriate alternatives. Cable ties or wire concealers are useful for managing cables and creating a clean, organized appearance. Optionally, purchasing a cable management box provides more concealment options and can be painted to match the wall.
Additional support may be necessary in some scenarios. If the wall studs are not spaced appropriately for the wall mount, a piece of plywood can be used as a bridging board. The plywood is attached to the studs, and then the wall mount is attached to the plywood. This distributes the weight more evenly and allows for greater flexibility in mounting location. Anchors designed specifically for drywall can be used in conjunction with stud mounting, but these should only be used as a supplement, not as the primary support.
Installation Procedure
Once the preparatory steps are completed and the necessary tools and materials are gathered, the installation process can begin. This procedure involves attaching the mounting bracket to the wall, attaching the mounting arms to the TV, and then connecting the TV to the bracket.
The first step is to attach the wall plate. Align the wall plate with the marked stud locations, ensuring that it is perfectly level. Use a level to verify its horizontal alignment. Mark the locations for the mounting screws through the holes in the wall plate. Drill pilot holes at the marked locations. The diameter of the pilot holes should be slightly smaller than the diameter of the mounting screws. Secure the wall plate to the studs using the appropriate screws. Ensure that the screws are tightened securely, but avoid over-tightening, which can strip the screw holes. If using a bridging board, attach it securely to the studs first, and then attach the wall plate to the bridging board.
The next step is to attach the mounting arms to the TV. Lay the TV face down on a soft, protected surface to prevent damage to the screen. Locate the VESA mounting holes on the back of the TV. Align the mounting arms with the VESA holes. Use the appropriate screws and washers to attach the mounting arms to the TV. Ensure that the screws are tightened securely, but avoid over-tightening. Some TVs may require spacers to ensure that the mounting arms are flush with the back of the TV. Consult the wall mount's instructions for specific guidance.
The final step is to hang the TV on the wall plate. Carefully lift the TV and align the mounting arms with the corresponding slots or hooks on the wall plate. Secure the TV to the wall plate according to the wall mount's instructions. This may involve locking mechanisms, screws, or other securing devices. Ensure that the TV is securely attached to the wall plate before releasing it. Double-check that all connections are secure and that the TV is level. Adjust the viewing angle as desired, if the wall mount allows for adjustments.
Post-Installation and Cable Management
After the TV is mounted, several tasks remain to ensure a clean and functional installation. These tasks include managing the cables, concealing them if desired, and testing the functionality of the TV.
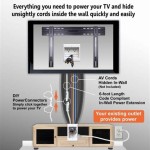
Cable management is crucial for a clean and organized appearance. Gather the cables together and secure them with cable ties or Velcro straps. Route the cables along the wall, preferably behind the TV, to minimize their visibility. Use cable concealers or raceways to hide the cables along the wall. These concealers can be painted to match the wall color for a seamless look. Optionally, install a cable management box behind the TV to conceal the cables and power strip. If relocating power outlets, ensure that the work is done by a qualified electrician.
Test the TV after installation to ensure that it is functioning correctly. Connect all necessary cables, such as HDMI cables, power cables, and antenna cables. Turn on the TV and verify that it displays a clear picture and sound. Check the functionality of all input sources, such as cable boxes, DVD players, and gaming consoles. If any problems are encountered, troubleshoot the connections and settings. Re-tighten all screws and connections to ensure that they are secure.
Periodic maintenance is recommended to ensure the continued safety and stability of the installation. Regularly check the mounting hardware for any signs of loosening or damage. Tighten any loose screws or replace any damaged components. Inspect the wall around the mounting bracket for any signs of stress or cracking. If any structural problems are detected, consult a qualified professional.
By following these detailed instructions, a secure and aesthetically pleasing TV wall mount installation on drywall can be achieved. Careful planning, accurate measurements, and proper execution are key to a successful outcome. If unsure about any aspect of the installation, it is always best to consult a qualified professional.

How To Install A Tv Wall Mount On Drywall Primecables Ca Blog

2 Ways To Hang Tv On Wall Mount Into Stud And Drywall Review Youtube

How To Install Tv Wall Mount On Drywall Av Express Com Youtube

Best Drywall Anchors For Mounting Tvs And Other Heavy Items Ptr
What Is The Best Way To Mount A Tv On Wall Quora

Why Mounting A Tv In Condo Is Diffe From House Leslievillegeek Installation And Wire Hiding Experts

Best Drywall Anchors For Mounting Tvs And Other Heavy Items Ptr

Best Drywall Anchors For Mounting Tvs And Other Heavy Items Ptr

Mount Tv On Cement Block Behind Drywall Doityourself Com Community Forums

Studless Drywall Tv Mount For 26 55 Inch Tvs No Stud Wall Bracket Max Vesa 400x400mm Up To 80 Lbs Universal Fits Wal Ca

