How To Mount A Wall Sconce
Wall sconces are a great way to add light and style to your home. They can be used in any room, from the living room to the bedroom. But before you can enjoy your new sconces, you need to mount them on the wall. Here's a step-by-step guide on how to do it yourself.
Step 1: Gather your tools and materials
You will need the following tools and materials to mount your wall sconces:
- Wall sconces
- Screws
- Drill
- Screwdriver
- Level
- Pencil
Step 2: Choose a location for your sconces
The first step is to choose a location for your sconces. Consider the following factors when choosing a location:
- The height of the sconces: The sconces should be mounted at a height that is comfortable for you to reach and turn on. A good rule of thumb is to mount the sconces about 5 feet from the floor.
- The distance between the sconces: The sconces should be mounted far enough apart so that they don't create a glare. A good rule of thumb is to mount the sconces about 3 feet apart.
- The style of the sconces: The style of the sconces should complement the style of your home. For example, if you have a traditional home, you might choose sconces with a classic design. If you have a modern home, you might choose sconces with a more contemporary design.
Step 3: Mark the location of the sconces
Once you have chosen a location for your sconces, it's time to mark the location of the screw holes. To do this, hold the sconce up to the wall and mark the location of the screw holes with a pencil. Be sure to use a level to make sure that the sconce is level.
Step 4: Drill pilot holes
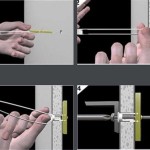
Once you have marked the location of the screw holes, it's time to drill pilot holes. Pilot holes help to prevent the wood from splitting when you screw in the screws. To drill pilot holes, use a drill bit that is slightly smaller than the screws you will be using.
Step 5: Mount the sconces
Now it's time to mount the sconces. To do this, insert the screws into the pilot holes and tighten them until the sconces are securely mounted to the wall. Be sure to use a screwdriver that is the correct size for the screws.
Step 6: Connect the wires
Once the sconces are mounted, it's time to connect the wires. To do this, follow the instructions provided by the manufacturer of the sconces. In general, you will need to connect the black wire from the sconce to the black wire from the electrical box, and the white wire from the sconce to the white wire from the electrical box. You may also need to connect a ground wire from the sconce to the ground wire in the electrical box.
Step 7: Turn on the sconces
Once the wires are connected, it's time to turn on the sconces. To do this, simply flip the switch that controls the sconces. If the sconces do not turn on, check to make sure that the wires are connected correctly. You may also need to check the circuit breaker or fuse to make sure that the power is on.
Tips
Here are a few tips for mounting wall sconces:
- If you are not sure how to wire the sconces, consult an electrician.
- Be sure to use the correct size screws for the sconces.
- Make sure that the sconces are mounted securely to the wall.
- If you are mounting the sconces on a plaster wall, you may need to use special anchors.
- Once the sconces are mounted, clean them with a soft cloth.

Electric Wall Sconce Assembly Installation Guide

How To Install Sconces On The Side Of Built Ins Hiding Wires Remodelando La Casa

How To Install A Wall Mounted Light Fixture The Home

Lightess Indoor Wall Sconce Dimmable 10w Modern Led Lamp Black Up Down Mount Review

Easy To Install Vintage Wall Sconces Jackyled Review Modern Decorative Farmhouse Youtube

What Is A Wall Sconce The Ultimate Guide Van Dyke S Rers

How To Install A Wall Mounted Light Fixture The Home

Rotatable Li Wall Sconce Lighting Post Modern Metal 2 4 Heads Gold Mount Light Clearhalo

Modern Black Led Flush Mount Wall Sconce With Glass Globe Shade

1 Light Hallway Wall Sconce Lighting Contemporary Bronze Mount Fixture With Ribbed Crystal Shade


