How To Mount Tv To Plaster Wall
Mounting a TV to a plaster wall requires careful preparation and the right tools to ensure a secure and stable installation. Here's a step-by-step guide to help you safely mount your TV on a plaster wall:
1. Gather Your Tools and Materials:
* TV mount * Stud finder * Level * Drill * Screwdriver * Screws or bolts (type and size will vary based on the TV mount and wall) * Drywall anchors (optional) * Painter's tape (optional)Before starting, turn off your TV and unplug it from any power sources for safety.
2. Determine the Mounting Location:
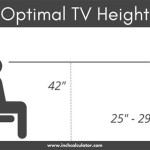
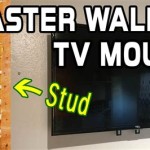
* Choose the optimal viewing height and angle for your TV. * Use a stud finder to locate the studs in the wall. Studs provide the most secure support for the TV mount. * Mark the center of the desired mounting location on the wall.If no studs are available at the desired location, you may need to use drywall anchors to provide additional support. Drywall anchors are designed to distribute the weight of the TV across a larger area of the wall.
3. Attach the TV Mount to the Wall:
* Position the TV mount over the marked location on the wall. * Use a level to ensure that the mount is level both horizontally and vertically. * If using studs, drill pilot holes into the studs through the designated holes on the TV mount. * If using drywall anchors, follow the manufacturer's instructions to insert and secure the anchors into the wall. * Drive the screws or bolts through the TV mount and into the studs or drywall anchors. Tighten securely.Note: The type and size of screws or bolts required will vary depending on the TV mount and wall type. Refer to the manufacturer's instructions for specific recommendations.
4. Mount the TV on the Bracket:
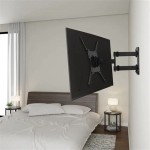
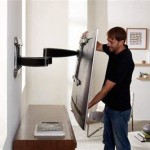
* Lift the TV and carefully align it with the mounting bracket. * Slowly lower the TV onto the bracket and secure it according to the manufacturer's instructions. * Ensure that the TV is securely locked in place and cannot be pulled off the bracket.Use painter's tape to protect the TV screen from scratches during the installation process if desired.
5. Connect the Cables and Devices:
* Connect all necessary cables (HDMI, power, etc.) to the back of the TV. * Tuck the cables neatly behind the TV and secure them with cable ties or clips to prevent clutter and potential hazards. * Connect the TV to power and turn it on.Check the alignment and ensure that the TV is level and stable on the wall.
Safety Tips:
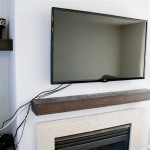
* Always refer to the manufacturer's instructions for specific mounting requirements and safety precautions. * If you are unsure about any aspect of the installation, consult a qualified professional. * Use a sturdy and appropriate TV mount that is rated to support the weight of your TV. * Ensure that the wall is strong enough to support the weight of the TV and mount. If necessary, reinforce the wall or use a different mounting location. * Never mount a TV over a fireplace or other heat source. * Keep all electrical cords and cables tidy and out of reach of children and pets.
How To Mount Tv On Plaster Lath Wall Magnetic Stud Finder For Walls Youtube

How To Hang A Tv On Plaster Wall Best Anchoring Practices

How To Hang A Tv On Plaster Wall Best Anchoring Practices

Mounting Tv On Plaster Wall No Studs

How To Mount Tv On Plaster Wall Easily Magnetic Stud Finder Tips Youtube

How To Mount A Tv On Plaster Wall Without Studs Easily Installation Toronto

How To Mount Led Tv On Plaster Wall

How To Mount A Tv On Plaster Wall Without Studs

How To Mount Led Tv On Plaster Wall Youtube

How To Hang A Tv On Plaster Wall Best Anchoring Practices

