How to Remove a TV Mount from a Wall: A Comprehensive Guide
Removing a TV mount from a wall is a task that might seem daunting, but with proper preparation, the right tools, and a systematic approach, it can be accomplished safely and efficiently. Whether the intention is to relocate the television, repaint the wall, or simply remove the mounting hardware altogether, understanding the process is crucial to prevent damage to the wall and potential injury.
Before commencing the removal process, gather the necessary tools and materials. Safety should be prioritized throughout the entire procedure. This guide outlines the steps involved in removing a TV mount, ensuring a smooth and damage-free removal.
Essential Tools and Materials
Successfully removing a TV mount requires having the appropriate tools readily available. This preparation step significantly contributes to efficiency and prevents potential setbacks during the process. Neglecting to gather the necessary equipment beforehand can lead to frustration and increased risk of damaging the wall or the mount itself.
The following is a comprehensive list of tools and materials commonly needed for removing a TV mount:
*Screwdriver Set:
A variety of screwdriver sizes and types (Phillips head and flathead) are indispensable. Different mounts use different types of screws, and having a versatile set ensures compatibility. *Socket Wrench Set:
Similar to screwdrivers, socket wrenches come in various sizes and are useful for loosening or tightening bolts, which are sometimes used in more robust mounting systems. *Stud Finder:
This tool is essential for locating the wall studs to which the mount is secured. Knowing the stud locations is crucial for determining the type of fasteners used and ensuring proper wall repair after the mount is removed. *Drill with Driver Bits:
While not always necessary, a drill with compatible driver bits can significantly expedite the process, especially when dealing with stubborn screws. *Pencil:
A pencil is used for marking wall stud locations, outlining the mount's position, and indicating areas that require repair. *Level:
A level is helpful for ensuring any replacement hardware or wall repairs are straight and aligned. *Safety Glasses:
Protecting the eyes from debris is paramount. Safety glasses should always be worn when working with tools and hardware. *Gloves:
Gloves provide a better grip and protect the hands from sharp edges or splinters. *Painter's Tape:
Painter's tape is used to mark the perimeter of the mount before removal. This reduces the risk of scratching the wall when maneuvering the mount. *Wall Patching Compound:
This is essential for filling in any holes left by the mounting hardware. *Sanding Sponge or Sandpaper:
Used to smooth out patched areas on the wall. *Putty Knife or Spackle Knife:
This tool is used to apply the wall patching compound evenly. *Paint (Matching Wall Color):
After patching the wall, matching paint will conceal the repairs seamlessly. *Drop Cloth or Protective Covering:
This is important to protect the flooring from dust, paint, and debris. *Step Ladder:
Provides safe access to higher portions of the wall, which is often necessary for TV mounts.The Step-by-Step Removal Process
Once all the necessary tools and materials are gathered, the actual removal process can begin. This process involves several key steps, each designed to ensure safety and minimize potential wall damage. It is important to proceed methodically and carefully, paying close attention to the type of mount and the fasteners used.
The following steps outline the complete process of removing a TV mount:
1.Preparation and Safety:
Begin by laying down a drop cloth or protective covering to protect the floor beneath the work area. Ensure adequate lighting and ventilation. Put on safety glasses and gloves. Before removing any screws, take pictures of the mount to document its configuration. This will be helpful if you need to reinstall it later. 2.Locate Wall Studs:
Use a stud finder to accurately identify the wall studs to which the mount is attached. Mark the stud locations with a pencil. This will be crucial for patching the wall later. 3.Remove the TV (If Applicable):
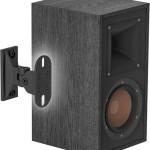
If the TV is still attached to the mount, carefully detach it. Typically, this involves unlocking or unhooking the TV from the mounting bracket. Ensure someone assists with this step, especially with larger TVs, to prevent accidents. Store the TV safely in a secure location. 4.Identify Fastener Type:
Examine the fasteners used to secure the mount to the wall. Determine whether they are screws, bolts, or lag bolts. This will dictate the type of screwdriver or socket wrench that will be needed. 5.Loosen and Remove Fasteners:
Using the appropriate screwdriver or socket wrench, carefully loosen and remove the fasteners. Start with the top fasteners and work downwards. If the screws are difficult to remove, try using a drill with a driver bit on a low setting. Be cautious not to strip the screw heads. Place all removed fasteners in a container to prevent them from being lost. 6.Detach the Mount:
Once all the fasteners are removed, carefully detach the mount from the wall. If the mount is stuck, gently wiggle it back and forth to loosen it. Avoid forcing it, as this can damage the wall. Have someone assist with this step, especially if the mount is heavy. 7.Inspect the Wall:
After the mount has been removed, inspect the wall for any damage. This includes looking for holes, cracks, or torn drywall. Mark any areas that require repair with a pencil. 8.Remove Anchors (If Applicable):
If the mount was attached using wall anchors, carefully remove them. Different types of anchors require different removal methods. For example, plastic anchors can often be pulled out with pliers, while metal anchors may require unscrewing or tapping them into the wall. 9.Clean the Wall:
Use a damp cloth to clean the wall around the mounting area. This will remove any dust, dirt, or adhesive residue. 10.Patch the Wall:
Using a putty knife or spackle knife, apply wall patching compound to fill in any holes or cracks. Smooth the compound over the surface and let it dry completely according to the manufacturer's instructions. 11.Sand the Patched Areas:
Once the patching compound is dry, use a sanding sponge or sandpaper to smooth out the patched areas. Be careful not to sand too aggressively, as this can damage the surrounding wall. 12.Prime and Paint:
Apply a coat of primer to the patched areas and let it dry completely. Then, apply a coat of paint that matches the wall color. Allow the paint to dry completely before proceeding. Apply a second coat of paint if necessary. 13.Clean Up:
Remove the drop cloth or protective covering and dispose of it properly. Sweep or vacuum the floor to remove any dust or debris. Return all tools to their storage locations.Addressing Potential Challenges
While the removal process is generally straightforward, several potential challenges can arise. Being prepared to address these challenges can prevent further complications and ensure a successful outcome.
Some common challenges and their solutions include:
*Stripped Screws:
If a screw head becomes stripped, preventing the screwdriver from gripping it, several techniques can be employed. One method involves placing a rubber band or steel wool between the screwdriver and the screw head to provide additional friction. Another option is to use a screw extractor, a specialized tool designed to remove stripped screws. *Stubborn Mount:
If the mount is difficult to detach from the wall, it may be due to paint or adhesive residue. Gently scoring around the perimeter of the mount with a utility knife can help break the seal. Using a pry bar with caution can also help loosen the mount, but be careful not to damage the wall. *Damaged Drywall:
If the drywall is significantly damaged during the removal process, more extensive repairs may be necessary. This could involve cutting out and replacing the damaged section of drywall. In such cases, consulting a professional drywall repairer may be advisable. *Unidentified Fasteners:
If the type of fasteners used is unclear, take close-up photographs and consult with a hardware store representative. They can identify the fastener type and recommend the appropriate tools for removal. *Hidden Wiring:
While uncommon, there is a possibility of encountering concealed wiring behind the mount. Before proceeding with any drilling or forceful removal, visually inspect the area and use a wire detector to identify any potential hazards. If wiring is present, consult with a qualified electrician before continuing.By addressing these potential challenges proactively, the TV mount removal process can be completed safely and effectively, leaving a clean and undamaged wall.
Following these steps will help ensure a successful removal of the TV mount, while minimizing damage to the wall. It's crucial to prioritize safety and take the necessary precautions throughout the procedure.

How To Uninstall A Tv Youtube

How To Remove Tv From Wall Mount Youtube

How To Remove A Tv Mount

How To Remove A Tv From Wall Mount Angi

How To Remove A Tv From Wall Mount The Plug Hellotech

How To Remove A Tv From Wall Mount The Plug Hellotech

How To Remove A Tv From Wall Mount Easy Guide Lowe S

Remove Tv In 427 Road Warrior Heartland Owners Forum

The Easy Tv Wall Mount Removal Guide It Blog

How To Safely Remove A Tv From Wall Mount Complete Guide