Mounting an Air Conditioner on a Wall: A Comprehensive Guide
Wall-mounting an air conditioner is a practical solution for optimizing space and achieving efficient cooling in various environments. This method involves securely attaching the air conditioning unit to a wall, freeing up floor space and allowing for strategic placement that promotes optimal airflow. However, the process requires careful planning, the proper tools, and adherence to safety guidelines to ensure a stable and functional installation.
This article provides a detailed overview of the factors to consider when mounting an air conditioner on a wall. It outlines the necessary steps, from assessing wall suitability to securing the unit, ensuring a comprehensive understanding of the process. This information is intended to guide individuals through the installation process or inform their assessment of professional installation services.
Assessing Wall Suitability and Unit Compatibility
Before initiating the wall-mounting process, a thorough assessment of the wall's structural integrity is paramount. The wall must be sufficiently strong to support the weight of the air conditioning unit, both when static and during operation. Different wall types, such as concrete, brick, or stud walls, possess varying load-bearing capacities, and each requires a specific approach to mounting.
Concrete and brick walls generally offer the most robust support. Specialized anchors designed for these materials are essential for a secure installation. These anchors, typically expansion bolts or chemical anchors, provide a strong grip within the masonry, distributing the weight evenly and preventing the unit from detaching over time.
Stud walls, constructed with wooden or metal framing, present a different challenge. These walls require careful identification of the studs, the vertical structural members that provide the primary support. Mounting the air conditioner directly to the studs is crucial, as drywall alone cannot bear the weight. A stud finder is a necessary tool for accurately locating the studs behind the wall surface.
Furthermore, the type of air conditioning unit being installed influences the mounting requirements. Window air conditioners, while sometimes adaptable for wall mounting, are typically designed for window installation. Mini-split systems, on the other hand, are specifically designed for wall mounting, with separate indoor and outdoor units. The indoor unit, responsible for cooling the air, is typically lighter and easier to mount than a window unit of comparable cooling capacity.
Consulting the manufacturer's specifications for the air conditioning unit is critical. The documentation will provide information on the unit's weight, dimensions, and recommended mounting procedures. This information is essential for selecting the appropriate mounting hardware and ensuring compatibility with the chosen wall location.
In cases where the wall's structural integrity is questionable or the air conditioning unit is particularly heavy, it is advisable to consult with a structural engineer. The engineer can assess the wall's load-bearing capacity and recommend reinforcement measures if necessary. This may involve adding additional studs, reinforcing existing studs, or installing a support structure behind the wall.
Preparing for Installation: Tools, Materials, and Safety Precautions
Proper preparation is essential for a successful and safe wall-mounting installation. This involves gathering the necessary tools and materials, understanding safety protocols, and preparing the work area. Rushing this stage can lead to errors, injuries, or damage to the air conditioning unit or the wall.
A comprehensive toolkit should include the following items: a stud finder (for stud walls), a drill with various drill bits (including masonry bits for concrete and brick), a level, a measuring tape, a pencil, a screwdriver (or a drill with screwdriver bits), a wrench, safety glasses, work gloves, and a ladder or scaffolding. The specific size and type of drill bits and screwdrivers will depend on the mounting hardware chosen.
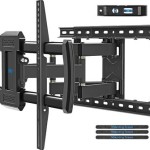
The selection of appropriate mounting hardware is critical. This includes brackets, anchors, screws, and washers, all chosen based on the weight of the air conditioning unit and the type of wall. Using hardware that is not rated for the load or incompatible with the wall material can result in a catastrophic failure, causing the unit to fall and potentially causing injury.
Before commencing the installation, disconnect the power supply to the area where the work will be performed. This is a crucial safety precaution to prevent electrical shock. If the air conditioner requires electrical connections, ensure that a qualified electrician handles the wiring. Improper electrical connections can create a fire hazard or damage the unit.
Clear the work area of any obstacles and protect the floor with drop cloths. This will prevent damage from debris and spills. Ensure adequate lighting to provide clear visibility during the installation process. A well-lit workspace reduces the risk of errors and accidents.
Wearing safety glasses and work gloves is essential to protect your eyes and hands from debris and sharp objects. If working at heights, ensure that the ladder or scaffolding is stable and secure. Follow all manufacturer's instructions for the safe use of power tools.
Finally, familiarizing oneself with local building codes and regulations is crucial. Some municipalities may require permits for air conditioner installations, particularly if they involve electrical work or structural modifications. Failure to comply with these regulations can result in fines or penalties.
The Wall-Mounting Process: A Step-by-Step Guide
Once the preparatory steps are complete, the actual wall-mounting process can begin. This involves precisely marking the mounting locations, drilling the necessary holes, securing the mounting brackets, and finally, attaching the air conditioning unit to the brackets. Each step requires precision and attention to detail to ensure a stable and reliable installation.
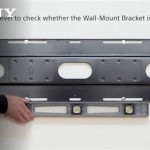
Begin by carefully measuring and marking the locations for the mounting brackets on the wall. Use a level to ensure that the brackets are perfectly horizontal. Accurate placement is essential for the air conditioner to sit level and function correctly. Consult the manufacturer's instructions for the recommended spacing between the brackets.
Using the appropriate drill bit for the wall material (e.g., masonry bit for concrete or brick), drill pilot holes at the marked locations. The depth of the holes should correspond to the length of the anchors being used. For stud walls, ensure that the pilot holes are drilled directly into the center of the studs.
Insert the anchors into the pilot holes. For expansion bolts, tighten the nut to expand the anchor and secure it within the hole. For chemical anchors, follow the manufacturer's instructions for injecting the chemical adhesive and allowing it to cure. The anchors should be firmly seated and flush with the wall surface.
Attach the mounting brackets to the wall using the appropriate screws and washers. Ensure that the screws are tightened securely, but avoid over-tightening, which can damage the wall or the brackets. Use a level to re-check that the brackets are perfectly horizontal after they have been attached.
With the mounting brackets securely in place, carefully lift the air conditioning unit and position it onto the brackets. Ensure that the unit is properly aligned and seated correctly on the brackets. Secure the unit to the brackets using the provided screws or bolts. Again, tighten the fasteners securely, but avoid over-tightening.
Once the air conditioning unit is mounted, inspect the installation carefully. Ensure that the unit is level, that all fasteners are tightened, and that there are no signs of instability. If the unit requires electrical connections, have a qualified electrician make the necessary connections. Test the air conditioner to ensure that it is functioning correctly.
After the installation is complete, clean up the work area and dispose of any debris. Retain the manufacturer's instructions and any warranty information for future reference. Periodically inspect the mounting hardware to ensure that it remains secure. If any signs of loosening or damage are observed, address them promptly to prevent a potential hazard.
While this guide provides a comprehensive overview of the wall-mounting process, it is important to acknowledge that specific installations may require adjustments or modifications based on the specific air conditioning unit, the wall type, and local building codes. If any doubts or uncertainties arise during the installation process, it is always advisable to consult with a qualified professional.

The Pros And Cons Of Wall Mounted Hvac Units Sewell Service

How To Install A Ductless Mini Split Air Conditioner This Old House

The Pros Cons Of Using An External Air Conditioner Wall Bracket To Mount

Wall Mount Air Conditioner Bard Manufacturing

Wall Mount Air Conditioner Bard Manufacturing

Wall Mounted Single Split Hvac Business Lg Global

Mini Split Wall Mounting Bracket For 12000 24000 Btu Universal Ductless Ac

Fyhale Wall Mount Air Conditioner 8000 Btu Portable Conditioning Heating And Cooling Combo High Power Remote Control For Indoor Home Kitchen

Through The Wall Air Conditioners A Climate Technology Guide

Mini Split Wall Mounted Mounting Ac Rack Air Conditioner Bracket Hanging Us