Sonos Playbar Wall Mount Kit: A Comprehensive Guide
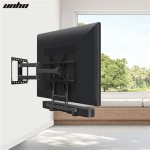
The Sonos Playbar is a popular choice for individuals seeking to enhance their home audio experience. Its sleek design and impressive sound quality make it a valuable addition to any entertainment setup. However, maximizing the Playbar's potential often involves optimizing its placement within the room. While the Playbar can be placed on a media console, wall mounting offers several advantages, including improved aesthetics, enhanced sound projection, and space saving. The Sonos Playbar Wall Mount Kit is specifically designed to facilitate this process, providing a secure and aesthetically pleasing solution for integrating the Playbar into a wall-mounted setup.
This article provides a comprehensive guide to the Sonos Playbar Wall Mount Kit, examining its features, benefits, installation process, and key considerations for optimal performance. Understanding these aspects will assist users in making informed decisions regarding their audio setup and ensure a seamless integration of the Playbar within their living space.
Key Benefits of Wall Mounting the Sonos Playbar
Wall mounting a Sonos Playbar, utilizing the dedicated wall mount kit, offers several significant advantages compared to placing it on a tabletop or media console. These benefits contribute to both the audio performance and the overall aesthetics of the home entertainment system.
Firstly, wall mounting elevates the sound projection, positioning the Playbar at an optimal height for directing audio towards the listening area. This can result in a more immersive and engaging sound experience, particularly for movie watching and gaming. When placed on a low surface, sound waves can be absorbed or muffled by furniture, reducing clarity and impact. Wall mounting mitigates this issue, ensuring that the audio is delivered directly to the listener's ears.
Secondly, wall mounting the Playbar contributes to a cleaner and more organized aesthetic. By removing the Playbar from the surface of a media console, valuable space is freed up, reducing clutter and creating a more streamlined look. This is particularly beneficial in smaller living spaces where maximizing surface area is crucial. The wall mount kit is designed to be discreet, ensuring that the focus remains on the Playbar itself and not on the mounting hardware.
Thirdly, wall mounting can enhance the Playbar's security. When placed on a tabletop, the Playbar is vulnerable to accidental bumps or falls, which could potentially damage the device. Wall mounting provides a more secure and stable platform, reducing the risk of such incidents. This is especially important in households with children or pets.
Finally, it allows for better cable management. The wall mount kit usually incorporates features to help conceal and organize the power and audio cables, contributing to the clean, minimalist look. Managing the cables prevents them from tangling or becoming visible that would make the system look messy.
Components of the Sonos Playbar Wall Mount Kit
A typical Sonos Playbar Wall Mount Kit includes several essential components designed to facilitate a secure and stable installation. Understanding these components is crucial for a smooth and successful mounting process.
The primary component is the mounting bracket itself. This bracket is designed to attach securely to the wall and provide a stable platform for the Playbar. The bracket is typically made of durable materials, such as steel, to ensure long-lasting support. Its design often incorporates features to minimize vibration and resonance, further enhancing the audio quality.
The kit includes screws, anchors, and other hardware necessary for attaching the bracket to the wall. The specific type of hardware will vary depending on the wall material (e.g., drywall, plaster, concrete). It is essential to use the appropriate hardware to ensure a secure and stable mount. The kit generally provide a range of screw sizes to facilitate installation on different types of walls.
Templates or guides are often included to assist with accurate placement of the mounting holes. These templates simplify the installation process by providing a clear indication of where to drill the holes in the wall. Using a template ensures that the Playbar is mounted level and at the desired height.
Some kits may also include cable management features, such as clips or channels, to help conceal and organize the power and audio cables. These features contribute to a cleaner and more organized aesthetic by preventing the cables from tangling or becoming visible.
An important part of the kit is the instruction manual. The manual provides step-by-step instructions on how to install the wall mount kit correctly. It also provides safety precautions that need to be followed during the installation.
Step-by-Step Installation Guide
Installing the Sonos Playbar Wall Mount Kit requires careful planning and execution to ensure a secure and level mount. Following a step-by-step guide can significantly simplify the process and minimize the risk of errors.
The first step involves planning the installation. Determine the desired location for the Playbar, taking into consideration the room's acoustics, viewing angles, and aesthetic preferences. Ensure that the chosen location is suitable for wall mounting and that there are no obstructions, such as electrical wiring or plumbing.
Next, gather the necessary tools and materials. This typically includes a drill, screwdriver, level, stud finder (if mounting to drywall), measuring tape, pencil, and the components of the Sonos Playbar Wall Mount Kit. Ensuring that all tools and materials are readily available will streamline the installation process.
Locate the wall studs using a stud finder. If mounting to drywall, it is essential to secure the mounting bracket to the studs for maximum stability. Mark the stud locations with a pencil. If studs are not accessible in the desired location, use appropriate drywall anchors to support the weight of the Playbar.
Using the provided template or measuring carefully, mark the location of the mounting holes on the wall. Ensure that the holes are level and properly aligned. Use a drill to create pilot holes at the marked locations. Use the appropriate drill bit size for the screws and anchors being used.
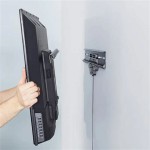
Attach the mounting bracket to the wall using the screws and anchors provided in the kit. Ensure that the bracket is securely fastened and level. Double-check the stability of the bracket before proceeding. Different wall types (drywall, concrete, brick) require different anchoring methods. Consult the wall mount kit instructions for guidance.
Connect the power and audio cables to the Playbar. Route the cables through the cable management features of the wall mount kit, if available. This will help conceal and organize the cables, contributing to a cleaner aesthetic.
Carefully lift the Playbar and attach it to the mounting bracket. Ensure that the Playbar is securely locked into place. Some wall mount kits incorporate locking mechanisms to prevent accidental dislodgement.
Finally, test the installation by gently shaking the Playbar to ensure that it is securely mounted. Verify that the audio is functioning correctly and that the sound is projected as desired. Make any necessary adjustments to the Playbar's position or settings to optimize the audio performance.
Considerations for Optimal Performance and Aesthetics
While the Sonos Playbar Wall Mount Kit provides a secure and convenient mounting solution, several considerations can further enhance the performance and aesthetics of the installation.
The height of the Playbar is a critical factor in optimizing sound projection. Ideally, the Playbar should be positioned at ear level when seated in the primary listening area. This will ensure that the audio is directed directly towards the listener's ears, maximizing clarity and impact. Adjust the mounting height accordingly.
The proximity of the Playbar to other audio components, such as a television or subwoofer, can impact the overall sound quality. Experiment with different placements to find the optimal configuration. Avoid placing the Playbar too close to reflective surfaces, as this can cause unwanted reflections and distortions.
Cable management is essential for maintaining a clean and organized aesthetic. Utilize the cable management features of the wall mount kit or employ additional cable ties and organizers to conceal and route the cables neatly. Avoid leaving excess cable length dangling, as this can create a cluttered appearance.
Consider the overall décor of the room when choosing the placement and orientation of the Playbar. The Playbar should complement the existing aesthetic and blend seamlessly into the environment. Avoid mounting the Playbar in a location that appears out of place or obstructs the flow of the room.
Regularly inspect the wall mount and the Playbar for any signs of damage or wear. Tighten any loose screws or hardware as needed. Ensure that the Playbar remains securely mounted and that the cables are properly connected. Periodic maintenance will help ensure long-lasting performance and prevent potential safety hazards.
Prioritize user safety during and after the installation process. Make sure that the necessary precautions are taken and follow guidelines established in the manual. Do not mount the speaker in areas that may pose a risk or where it could sustain damage.
Proper installation is essential for the Playbar’s performance, but other factors also play a role. Consider the acoustics of the room and make alterations as necessary. For instance, use sound-absorbing panels to reduce echo and unwanted noise.
Sonos Playbar Wall Mount Coolblue Before 23 59 Delivered Tomorrow

Sonos Playbar Speaker Wall Mount Kit Supplier And Manufacturer Lumi

Sonos Playbar Wall Mount Kit Easily And Securely Your At Crutchfield

Sonos Playbar Speaker Wall Mount Kit Supplier And Manufacturer Lumi

Suptek Wall Mount Bracket For Sonos Playbar Sound Bar Easy To Install Speaker

Sonos Pbrwmww1 Playbar Wall Mount Kit In Gcc Uae Worldwide

Playbar Wall Mount Bracket Kit With Mounting Accessories For Sonos Soundbar Designed In The Uk By Soundbass Wal Canada

Sonos Playbar Wall Mount Kit Black Pbrwmww1 Best In Uae Dubai Abu Dhabi Sharjah

Cavus Tv Frame Voor Sonos Playbar Kabeloutlet Com

Sonos Play Bar Wall Mount Valleyridge

