Starlink Gen 3 Wall Mount Kit: A Comprehensive Overview
The Starlink Gen 3 Wall Mount Kit is a specifically designed accessory for securely attaching the Gen 3 Starlink dish to a vertical surface. Unlike previous generations which often relied on makeshift mounting solutions or universal mounts adapted for the purpose, the Gen 3 kit offers a tailored and often necessary approach for users who cannot, or prefer not to, mount the dish on a roof or ground-based pole. This article will delve into the features, benefits, installation process, and considerations surrounding the use of the Starlink Gen 3 Wall Mount Kit.
The rationale behind choosing a wall mount over other mounting methods stems from various factors. Space constraints might preclude the use of a ground pole, while concerns about roof integrity or aesthetics might rule out rooftop installation. A wall mount provides a viable alternative, offering a secure and stable platform for the Starlink dish while minimizing its visual impact on the property. Furthermore, wall mounting can sometimes provide a more favorable field of view for the dish, optimizing signal reception. It also offers a streamlined installation process compared to some alternative methods.
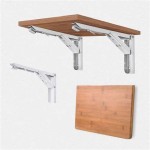
The kit itself typically includes the mounting bracket, necessary hardware such as screws and bolts, and potentially a drill template to aid in accurate hole placement. It is designed to withstand typical weather conditions and ensure a secure and long-lasting installation. Before purchasing, it is crucial to confirm compatibility between the kit and the specific Starlink dish model being used, as variations may exist between different generations and geographic regions. The Gen 3 wall mount may not be compatible with older generation Starlink dishes.
The selection of a suitable wall for mounting is paramount. Factors to consider include the wall's structural integrity, proximity to a power outlet for the Starlink router, and ensuring a clear, unobstructed view of the sky. Walls constructed from reinforced concrete or solid brick generally offer the most secure mounting surfaces. Siding, stucco, or other less robust materials may require additional reinforcement or the use of specialized anchors to ensure a stable and safe installation. Thoroughly assessing the wall's capabilities prior to commencing the installation process is critical to prevent potential issues down the line.
Beyond the physical wall, attention must be given to potential obstructions. Trees, buildings, or other structures can interfere with the Starlink dish's ability to establish a reliable connection to the satellite constellation. Utilize the Starlink app's obstruction finder tool to verify that the chosen wall location offers an adequate field of view. This tool, accessible through the Starlink mobile application, employs augmented reality to visually assess potential obstructions based on GPS location and device orientation.
Key Point 1: Components and Design Considerations
The Starlink Gen 3 Wall Mount Kit's design focuses on providing a robust and easy-to-install solution. The bracket itself is usually constructed from powder-coated steel or a similar durable material, offering resistance to corrosion and weathering. The design aims for a balance between strength and aesthetics, often featuring a low-profile appearance to minimize visual intrusion.
The included hardware is generally selected to be appropriate for a range of wall materials. However, it is the responsibility of the installer to verify the suitability of the provided hardware for their specific wall type. Substituting alternative anchors or fasteners may be necessary if the provided components are inadequate for the wall's construction. For instance, when mounting on hollow block walls, specialized sleeve anchors designed for such applications are recommended.
A critical design element is the allowance for cable management. The mount typically incorporates features such as cable clips or channels to neatly route the Starlink cable along the wall, preventing it from dangling or becoming a trip hazard. Proper cable management not only enhances the aesthetics of the installation but also protects the cable from potential damage. Consider the path the cable will take from the dish to the entry point into the building, ensuring it is adequately protected from the elements and potential physical damage.
The mounting bracket's geometry is designed to provide a stable and secure platform for the Starlink dish, minimizing vibration and maintaining consistent alignment. The dish attaches to the bracket via a series of bolts that must be tightened according to the manufacturer's specifications. Over-tightening can damage the dish or the bracket, while under-tightening can lead to instability. A torque wrench is recommended to ensure that the bolts are tightened to the correct specifications.
Ventilation and thermal considerations are also factored into the design. Adequate airflow around the Starlink dish is crucial to prevent overheating, particularly in hot climates. The wall mount typically positions the dish a short distance from the wall, promoting air circulation and dissipating heat. Avoid mounting the dish in locations that are prone to excessive heat, such as directly under a dark-colored roof.
Key Point 2: Installation Procedure and Best Practices
The installation of the Starlink Gen 3 Wall Mount Kit should be performed by a qualified individual or someone with sufficient experience in DIY projects involving drilling and fastening techniques. Always prioritize safety and follow the manufacturer's instructions carefully. Before commencing the installation, gather all necessary tools and materials, including a drill, drill bits (suitable for the wall material), a level, a measuring tape, a pencil, a socket wrench or adjustable wrench, and safety glasses. A stud finder can also be helpful in locating wall studs for additional support.
The first step is to accurately mark the locations for the mounting holes. Utilize the included drill template, if one is provided, to ensure proper spacing and alignment. If a template is not available, carefully measure and mark the hole locations using a measuring tape and a level. Double-check the measurements to prevent errors that could compromise the integrity of the installation.
Next, drill the pilot holes using a drill bit that is appropriate for the wall material and the size of the anchors. Ensure the holes are drilled straight and to the correct depth. For masonry walls, use a masonry drill bit and a hammer drill for optimal performance. For wood walls, use a standard wood drill bit.
Insert the anchors into the pilot holes. If using sleeve anchors or expansion bolts, follow the manufacturer's instructions for proper installation. Ensure the anchors are seated firmly and flush with the wall surface. For hollow block walls, use specialized sleeve anchors designed to grip the interior of the block.
Position the mounting bracket against the wall, aligning it with the installed anchors. Secure the bracket to the wall using the provided bolts and washers. Tighten the bolts securely, but avoid over-tightening. A torque wrench is recommended to ensure that the bolts are tightened to the correct specifications.
Attach the Starlink dish to the mounting bracket, following the manufacturer's instructions. Ensure the dish is properly aligned and secured to the bracket. Double-check that all bolts are tightened to the correct specifications. Connect the Starlink cable to the dish and route it along the wall using the provided cable clips or channels. Ensure the cable is neatly organized and protected from damage.
Key Point 3: Troubleshooting and Maintenance
Even with careful installation, issues can sometimes arise. One common problem is instability or movement of the dish during windy conditions. This can often be resolved by tightening the mounting bolts or adding additional support to the wall mount. Inspect the wall anchors regularly to ensure they are still securely fastened. If the anchors have loosened or corroded, replace them with new ones.
Signal interference can also occur, even after a seemingly successful installation. This can be caused by changes in the environment, such as tree growth or construction of new buildings. Re-check the Starlink app's obstruction finder tool to ensure that the dish still has a clear view of the sky. Adjust the dish's position slightly, if possible, to improve signal reception.
Regular maintenance is essential to ensure the long-term performance of the Starlink system. Inspect the cable regularly for damage or wear. Replace the cable if it is cracked, frayed, or otherwise damaged. Clean the Starlink dish periodically to remove dirt, dust, and debris. Use a soft cloth and a mild cleaning solution to avoid scratching the dish's surface. Avoid using harsh chemicals or abrasive cleaners.
If experiencing persistent problems, consult the Starlink support website or contact their customer service for assistance. Provide detailed information about the issue, including the location of the dish, the type of wall mount used, and any troubleshooting steps that have already been taken. Documenting the installation process with photos or videos can also be helpful in diagnosing and resolving issues.
Finally, always prioritize safety when working with electrical equipment or performing outdoor installations. Disconnect the power before working on the Starlink system. Wear appropriate safety gear, such as safety glasses and gloves. If unsure about any aspect of the installation process, consult a qualified professional.
The Starlink Gen 3 Wall Mount Kit provides a specific solution for installing the Gen 3 Starlink dish. By understanding its components, installation process, and potential issues, users are able to install the dish securely and optimize performance.

Starlink Mount Gen 3 Wall Oem Accessories Compatible With Standard V3 Models For Roof Durable Mounting Kit Includes Essential Tools 254 100 720022

Starlink Gen3 Router Gen 3 Dish Wall Mount Etsy

Starlink Mount Gen 3 Wall Oem Accessories Compatible With Standard V3 Models For Roof Durable Mounting Kit Includes Essential Tools 254 100 720022

Starlink Gen 3 Mount Ybervont Mounting Kit Heavy Duty Long Wall

Protective Wall Mount Kit For Starlink Gen 3 Router And Mercadolivre

Starlink Mount Gen 3 Wall Oem Accessories Compatible With Standard V3 Models For Roof Durable Mounting Kit Includes Essential Tools 254724572514

Adjustable Starlink Mounting Kit Gen 3 Ybervont Wall Mount

Adjustable Starlink Gen 3 Long Wall Mount Mounting Kit

Starlink Gen 3 Wall Mount For Router With Power Kit

Adjustable Starlink Gen 3 Long Wall Mount Mounting Kit

