Wall Mounting A Sony TV: A Comprehensive Guide
Wall mounting a television provides a sleek, modern aesthetic while also saving valuable floor space. For Sony TV owners, successfully mounting their device requires careful planning, the right tools, and adherence to safety guidelines. This article provides a detailed, step-by-step guide for properly wall mounting a Sony TV, focusing on key considerations for a secure and aesthetically pleasing installation.
Understanding the Mounting Process
Before commencing the wall mounting process, it is imperative to understand the fundamental steps involved. These typically encompass preparation, selecting the appropriate mount, locating wall studs, attaching brackets, and finally, mounting the TV. A thorough understanding of each step contributes to a smooth and safe installation.
The initial stage involves gathering all necessary equipment. This includes the wall mount itself, a drill, a stud finder, a level, a measuring tape, a pencil, and potentially wire management accessories. Having all tools readily available minimizes interruptions during the installation process.
Mount selection is crucial. The Video Electronics Standards Association (VESA) standard dictates the hole pattern on the back of the TV used for mounting. This pattern is usually expressed in millimeters, such as 200x200 or 400x400. The chosen mount must be compatible with the TV’s VESA pattern and weight capacity. This information is typically found in the TV's user manual or on Sony’s website. Selecting an incompatible mount can lead to instability or damage to the TV.
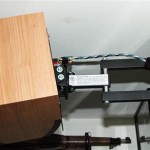
Locating wall studs is another critical step. Wall studs are the vertical wooden or metal beams that provide structural support within the wall. Attaching the TV mount directly to the studs is essential for a secure installation, especially for larger and heavier TVs. A stud finder is used to identify the location of these studs. Modern stud finders can detect the edges of the stud, providing a more accurate indication of the stud's center. If mounting to concrete or brick, specialized anchors are required, and professional installation is strongly advised.
After locating the studs, the wall mount brackets are attached to the wall. This process requires precise measurements and the use of a level to ensure the brackets are perfectly aligned. Misaligned brackets can result in a crooked TV, which is both aesthetically unpleasing and potentially unstable. The brackets are typically attached to the studs using screws, ensuring they are securely fastened.
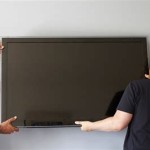
Once the wall brackets are securely in place, the TV brackets are attached to the back of the TV. These brackets also need to be securely fastened to ensure they can support the TV's weight. Then, the TV is carefully lifted and attached to the wall brackets. This step may require assistance, especially for larger TVs, to prevent accidental drops or injuries. After the TV is mounted, it is crucial to double-check that it is level and securely attached to the wall mount. Finally, wire management solutions can be employed to conceal cables and create a clean and organized appearance.
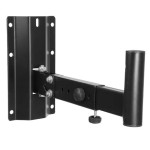
Selecting the Right Wall Mount
The selection of an appropriate wall mount is paramount to a successful and safe Sony TV installation. The chosen mount must be compatible with the TV’s weight, size, and VESA mounting pattern. There are several different types of wall mounts available, each offering unique features and benefits.
Fixed mounts are the simplest and most affordable type of wall mount. They position the TV close to the wall and do not offer any adjustability. Fixed mounts are ideal for situations where the viewing angle is already optimized and no adjustments are needed.
Tilting mounts allow the TV to be tilted up or down, which can improve the viewing angle by reducing glare or accommodating different seating heights. Tilting mounts are a good option for bedrooms or other rooms where the TV is positioned higher than the viewer’s eye level.
Full-motion mounts, also known as articulating mounts, offer the greatest flexibility. They allow the TV to be tilted, swiveled, and extended away from the wall. Full-motion mounts are ideal for rooms with multiple viewing positions or where the TV needs to be easily accessible for connecting cables or cleaning.
When selecting a wall mount, it is crucial to verify that it is rated for the TV’s weight. Exceeding the mount’s weight capacity can lead to instability and potentially cause the TV to fall. The VESA compatibility should also be confirmed. The VESA pattern is the square or rectangular arrangement of mounting holes on the back of the TV. The mount must have a VESA pattern that matches the TV’s pattern. This information is typically found in the TV's manual or on the manufacturer's website.
Beyond weight and VESA compatibility, the quality of the mount should also be considered. A sturdier mount constructed from high-quality materials will provide a more secure and reliable installation. Reading reviews and researching different brands can help ensure that the chosen mount is of sufficient quality. It is also worth considering any additional features that may be desirable, such as cable management options or a built-in level. These features can simplify the installation process and improve the overall aesthetic.
Step-by-Step Installation Guide
The following details a step-by-step guide for wall mounting a Sony TV. It assumes the necessary tools and a compatible wall mount have been acquired. Adherence to each step is critical for a secure and aesthetically pleasing installation.
Step 1: Preparation. Begin by unpacking the wall mount and verifying that all necessary hardware is included. Read the manufacturer's instructions carefully before starting the installation. Lay out all tools and components in an organized manner. Protect the TV screen by placing it face down on a soft, clean surface, such as a blanket or a padded table.
Step 2: Attach TV Brackets. Locate the VESA mounting holes on the back of the TV. Align the TV brackets with these holes and attach them using the provided screws. Ensure that the screws are tightened securely, but avoid over-tightening, as this could damage the TV. The instructions provided with the mount will specify the correct screw size and torque. If unsure, consult the TV's manual or a qualified technician.
Step 3: Locate Wall Studs. Use a stud finder to locate the wall studs in the desired mounting location. Mark the location of the studs with a pencil. It is essential to attach the wall mount to the studs for a secure installation. If mounting to a concrete or brick wall, specialized anchors are required. In this case, consult with a professional installer.
Step 4: Mount the Wall Plate. Position the wall plate on the wall, aligning it with the marked stud locations. Use a level to ensure the wall plate is perfectly horizontal. Mark the locations of the screw holes on the wall. Pre-drill pilot holes at the marked locations. Attach the wall plate to the wall using the provided screws. Ensure that the screws are securely fastened to the studs, but avoid over-tightening, which could strip the threads.
Step 5: Connect Cables. Before mounting the TV to the wall plate, connect all necessary cables, such as HDMI cables, power cables, and antenna cables. This will make it easier to connect the cables before the TV is mounted, especially if the connections are located in a difficult-to-reach area.
Step 6: Mount the TV. Carefully lift the TV and align the TV brackets with the wall plate. Attach the TV to the wall plate, ensuring that the brackets are securely engaged. Most mounts have a locking mechanism that secures the TV to the wall plate. Engage this mechanism to prevent the TV from accidentally falling. This step may require assistance from another person, especially for larger TVs.
Step 7: Level the TV. Use a level to ensure that the TV is perfectly horizontal. Some wall mounts have built-in leveling adjustments, which can be used to fine-tune the TV's position. Adjust the TV as needed until it is perfectly level.
Step 8: Manage Cables. Use cable management accessories, such as cable ties, cable sleeves, or cable channels, to organize and conceal the cables. This will create a clean and organized appearance. Run the cables along the wall or through the wall, if possible, to minimize their visibility.
Step 9: Test the Installation. Once the TV is mounted and the cables are managed, test the installation by turning on the TV and verifying that all connections are working properly. Check the picture quality, sound, and functionality of all connected devices.
Following these steps meticulously helps ensure a safe and aesthetically pleasing installation of a Sony TV on a wall. If uncertainty arises at any point, seeking professional assistance is always recommended.

Su Wl850 Wall Mount Bracket Sony Singapore

Support For Wall Mount Bracket Sony Sg

Mounting Sony Tv On Vesa Bracket Page 1 Home Cinema Hi Fi Pistonheads Uk

How To Wall Mount Your Tv X80h X90h X91h X95h Series Of 55 65 Inches Sony Ap

How To Wall Mount Your Oled Tv Af9 Series Sony Uk
How To Wall Mount Your Tv X80h X90h X91h X95h Series Of 55 65 Inches Sony Ap

Sony W6 7 8 9 Bolt Kit Av4home

How To Wall Mount Your Sony Led Tv Youtube

Affordable Sony Television And Soundbar Wall Mounted Sydney

Sony Tv Wall Mounts One For All